Water damage to drywall is a common issue in homes. It occurs due to leaks, flooding, or high humidity levels. When drywall absorbs moisture, its integrity can be compromised. This can lead to issues ranging from structural damage to the growth of mold and mildew. Homeowners must address this problem efficiently to prevent more extensive and costly repairs down the line.

Identifying water damage early on is the first step in the repair process. The damage may present itself through discolored patches, peeling paint, a musty odor, or drywall that feels soft to the touch. Taking immediate action is crucial for limiting the impact of the water damage. Safety is paramount, as moisture can lead to hazardous conditions. These include the risk of mold, which can be harmful to health, or even structural failure in severe cases.

Accurate identification is critical in the effective handling of water-damaged drywall. A thorough assessment prevents further deterioration and ensures the integrity of repair work.
To assess the extent of water damage, one must look for clear indicators. Discoloration and warping are often the most visible signs. It is essential to check the drywall's surface aesthetics and structural solidity. Affected areas may feel soft to the touch, indicating compromised integrity that requires attention.
Moisture in drywall often leads to mold growth, which appears as black or green speckles and carries a musty odor. Early detection of moisture and mold can prevent health hazards and significant damage.
One should use a moisture meter for a definitive assessment of moisture levels. This tool provides a quantitative measure of moisture content in the drywall, allowing for an accurate evaluation of the extent of water infiltration.
Leveraging the above techniques and tools, one can confidently identify and quantify water damage, forming the basis for effective remediation strategies.

When addressing water damage in drywall, it is crucial to put health and safety first. A careful approach must be maintained to avoid hazards such as electrical risks and exposure to mold.
Individuals should wear protective gear to mitigate risks. Essential items include:
Before starting repairs, ensure the area is safe from electrical hazards:
Water damage can lead to the growth of mold and mildew, posing serious health risks. To handle this:

When dealing with water-damaged drywall, using the right tools and materials is critical for a successful repair. The following subsections list essential items necessary for the repair process, ensuring that the drywall is restored properly and safely.
Effective water damage mitigation is essential to minimize the impact on drywall and prevent further deterioration of the structure. It involves a series of precise steps including stopping the water source, drying out the affected area, and preventing mold growth with proper humidity control.
The first and most critical step in mitigating water damage to drywall is to stop the water source. Immediate actions should be taken to address any leaks or water intrusion. Homeowners and contractors can follow these specifics:
Once the water source is controlled, the next step is to dry out the affected area. Rapid and thorough drying is crucial to prevent further damage and the potential for mold growth. The following should be considered:
One of the ongoing concerns post-water damage is the risk of mold development. Dehumidifiers are vital in maintaining low humidity levels, which are inhospitable to mold. Implement these measures:

Before initiating repairs on water-damaged drywall, removing all compromised material is critical. This ensures a stable base for restoration.
For smaller areas of damage, precise cutting tools such as a drywall saw or utility knife are ideal. The cut should encompass all water-damaged sections and extend to the center of adjacent studs for support. Steps include:
If a significant portion of drywall is affected, larger sections may need removal:
Proper disposal is fundamental to maintaining a safe and clean work area.
Remember to handle materials carefully to avoid scattering dust and debris.
Repairing water-damaged drywall requires attention to detail in patching, sealing, and finishing to ensure a seamless blend with the surrounding wall. https://www.youtube.com/embed/PoY6bfQUGQ8
First, cut out the damaged section of drywall and ensure the area is completely dry. Then, measure and cut a patch of new drywall to fit the opening.
Next, you should apply joint compound. Before applying the compound, cover the seams with drywall tape. After the first layer has dried, apply subsequent layers as needed. Allow each layer to dry completely.
Once the repair site is smooth and dry, you should prime the area to seal the patched drywall and help the paint adhere correctly.
After primer application, painting the area with a color matching the rest of the wall is crucial for hidden repairs. Multiple coats may be necessary, with ample drying time between each application to achieve a uniform finish.
For the repaired area to blend seamlessly with the existing wall, sanding must be performed between coats of joint compound and after the final layer is dry.
Use fine-grit sandpaper to eliminate any bumps or ridges. Where texture is needed, wall texture spray may be applied to mimic the pattern of the surrounding area. The goal is to ensure the repaired section is indiscernible from the rest of the wall.
When reconstructing water-damaged walls, the priority is to ensure a sturdy structure by installing new drywall, carefully taping and texturing to match the existing wall, and finishing with precise painting and trim work.
Once structural damage is assessed and the old, unusable drywall is removed, you can measure and cut a new piece of drywall to fit the gap.
During installation, make sure to secure the new drywall with drywall screws. Drywall clips can help anchor the new section to the existing wall, ensuring stability and alignment.
After the new piece of drywall is installed, the repair process continues with the application of joint tape over the seams. This creates a smooth connection between the new and old sections.
Then, apply a layer of joint compound over the tape. Refinishing involves allowing the compound to dry completely before meticulously sanding it to achieve a texture that matches the surrounding area.
The final stage involves painting the repaired area to match the rest of the wall.
Materials like primer and paint should be carefully selected to complement the wall color and sheen, avoiding visible discrepancies.
Trim work is reinstalled or touched up as needed to create a seamless transition from the repaired section to the surrounding structure, ensuring the area shows no signs of previous swelling, sagging, or cracks.
Handling water-damaged drywall often goes beyond a simple do-it-yourself project, especially when structural integrity is at risk. Professional assistance ensures safety and efficiency in restoration, and it is crucial when dealing with major damages or insurance claims.
Homeowners should contact a professional restoration company immediately when the water damage is extensive, or there’s a risk of structural damage. Signs that necessitate expert intervention include:
Professionals are equipped with the necessary safety gear, such as safety goggles, and have the expertise to handle these situations without causing further damage.
A professional restoration company should be engaged when there is any indication of structural damage. They can accurately assess the extent of the water damage, including any potential harm to the property’s structural elements.
Their approach typically includes:
Insurance claims for water damage can be complex and require detailed documentation. Professional assistance can make this process smoother.
Experts in water damage restoration will:
Preventing water damage in drywall is essential to maintain the structural integrity and aesthetic appeal of a home. Through regular inspections, prompt leak management, and humidity control, homeowners can safeguard their property against the costly and disruptive effects of water damage.
One should conduct regular inspections of drywall for early signs of moisture buildup or damage. Key areas to check include:
Preventative maintenance is crucial. Homeowners are advised to:
Plumbing problems can quickly lead to significant drywall damage if not addressed promptly. Here are steps to mitigate this risk:
Excessive moisture in the air can lead to condensation, which over time can damage drywall. It is important to:
By continuously managing indoor humidity, homeowners can prevent the accumulation of moisture that can compromise their drywall.
When addressing water damage on drywall, it is critical to account for the unique challenges posed by different environments and types of exposure. Each scenario requires specific attention to ensure the integrity of the repair and the safety of occupants.
In bathrooms and areas with high humidity, the persistent moisture can compromise drywall integrity. These zones necessitate the use of moisture-resistant drywall and potentially the application of a vapor barrier to prevent recurring damage. For effective longevity, consider using:
Damage caused by contaminated water, such as sewage backup, poses significant health risks. It is imperative to:
When the water-damaged drywall is near electrical outlets or wiring, extreme caution is necessary. Ensure power is turned off to the area, and consult a professional if in doubt. Damage assessment and repairs should account for:
Efficient management of water-damaged drywall is essential to maintain the structural integrity and appearance of a home. Homeowners are advised to assess the damage meticulously and repair or replace compromised drywall to avert potential health hazards and further property degradation.
Preventative measures can significantly reduce the risk of future water damage. Homeowners should:
Maintenance routines, such as checking for discoloration or swelling in drywall, help in early detection and can limit the extent of damage. In conclusion, homeowners are encouraged to approach water-damaged drywall with a proactive stance—repair damage promptly and invest in prevention to safeguard their living spaces.
Popcorn ceilings, once a popular home decor trend in the late 20th century, are now often regarded as outdated and undesirable. These textured ceilings, named for their bumpy, cottage cheese-like appearance, have become a point of contention for homeowners considering modernizing their living spaces. As tastes have shifted towards smoother ceiling finishes, the question arises whether it is worth the effort and expense to remove popcorn ceilings.

Removing popcorn ceilings can be more than just an aesthetic update. These ceilings have the potential to harbor health risks, particularly if they contain asbestos, which was commonly used in their construction before it was banned in the late 1970s. Prior to undertaking the removal process, it's crucial for homeowners to test for asbestos to ensure safety. Beyond health concerns, there are additional reasons to consider removal, including increasing home value, simplifying painting, and improving lighting by reducing shadows cast by the uneven surface.
A popcorn ceiling, also known as a cottage cheese ceiling or stucco ceiling, is a surface treatment characterized by a bumpy texture. They were widely popular for their acoustic advantages and ease of application.
Popcorn ceilings gained popularity in the United States from the late 1950s through the 1980s. They are typically a mixture of white stucco or polystyrene—which gives the ceiling a bumpy, textured appearance—and various binding agents. A key point to note is that until the Clean Air Act of 1978, asbestos, renowned for its fire-resistant properties, was commonly used in popcorn ceiling compositions.
The primary concerns with popcorn ceilings are twofold: the presence of asbestos in ceilings installed pre-1978 and the difficulty of cleaning and maintenance due to their uneven texture.
Homeowners may also find the style outdated and prefer a more modern look, which can lead to considering the removal of the popcorn texture from their ceilings.

Popcorn ceilings installed before the 1980s may pose health risks due to the presence of asbestos, a known carcinogen. Other potential hazards include the release of particles during removal or deterioration that can be toxic to occupants.
Popcorn ceilings are a health hazard if they contain asbestos. The Environmental Protection Agency identifies asbestos as a cancer-causing substance which, when inhaled, can lead to serious health conditions such as lung cancer and mesothelioma. Exposure to asbestos is particularly hazardous during renovation or damage to the ceiling's texture, as the fibers can become airborne.
Noteworthy Points:
Apart from asbestos, popcorn ceilings might also contain other toxic substances such as silica, which is a component of some plaster materials used to create the popcorn texture. Silica, when disturbed and inhaled as dust, acts as a carcinogen and can contribute to respiratory issues. The process of asbestos removal must be conducted with care, following strict guidelines to prevent the dispersal of toxic materials.
Key Hazards:
Before removing popcorn ceilings, it's imperative to test for asbestos, which can pose serious health risks if disturbed. This process should be conducted by professionals or through reliable test kits.
Asbestos was commonly used in popcorn ceilings installed before 1978. Any homeowner considering ceiling renovation must test if their home falls within this timeframe. The absence of visible signs does not eliminate the possibility of asbestos. It remains crucial to test even if degradation or damage is not apparent.
Homeowners have two primary options for testing asbestos: hiring a licensed professional or using an asbestos test kit.
Whether employing a professional or a test kit, it is critical to minimize disturbance of the ceiling material to reduce the risk of asbestos fibers becoming airborne.
Removing popcorn ceilings can transform a living space. It modernizes interiors, increases property value, and removes potential health hazards.

.
Removing a popcorn ceiling involves weighing the costs against the potential uplift in a home's aesthetic and value. Homeowners should consider the financial implications and the complexity of the task before proceeding.
When homeowners decide to remove popcorn ceilings, they face the choice of tackling the project themselves or hiring professionals. DIY costs mainly include materials such as scrapers, joint compound, paint, and protective gear, typically costing between $30 to $200 depending on the room's size and the quality of the materials. In contrast, hiring professionals comes with a higher price tag, where labor costs alone can range from $1 to $3 per square foot. These expenses are amplified by the cost of materials and equipment that professionals bring, leading to total costs that can vary widely, with HomeAdvisor estimating an average of $1,565, but it could go over $2,800 for larger projects.
Several key factors influence the total cost of removing a popcorn ceiling.
Homeowners must obtain multiple quotes from licensed professionals to ensure pricing transparency and find a service that best fits their financial situation.
When it comes to addressing popcorn ceilings, homeowners have options other than complete removal. These alternatives can be cost-effective and less labor-intensive while providing an updated appearance.
One can easily cover popcorn ceilings with drywall or ceiling tiles. Installing drywall directly onto the ceiling is a straightforward process that encapsulates the unwanted texture. This method provides a smooth finish that can then be painted or further customized.
Ceiling Planks: For a more natural look, one might consider installing wooden planks. Lightweight faux wood options such as MDF or laminate are available and can be attached with adhesive or a nail gun.
An alternative approach is to enhance the existing popcorn texture, especially if it contains vermiculite which might make removal more complicated due to potential asbestos concerns.
Texturing Over Popcorn: Adding a new layer of texture can modernize the ceiling. Options include "knockdown" texture or applying a plaster skim coat for a smooth finish.
Incorporating ceiling fixtures like tasteful lighting can also draw the eye away from the texture and update the space effectively. It's crucial to ensure that fixtures are anchored securely when dealing with a textured ceiling.

When considering whether to remove popcorn ceilings in the context of home improvement, homeowners should weigh several factors.
However, homeowners should also be mindful of:
Homeowners must decide based on:
Given these considerations, removal of popcorn ceilings may offer a fresher, more modern look that could improve the overall ambiance of an older home. It also might contribute to increased marketability and property value. Yet, the decision must align with the homeowner's priorities and resources.
Removing a popcorn ceiling can refresh the look of a room and eliminate the dated appearance that such textures often convey. Popcorn ceilings were once trendy for their acoustic properties and ease of application. Still, they can collect dust over time and become discolored, leading many homeowners to seek smoother, more modern ceilings. Before embarking on the removal process, it’s important to check for asbestos, especially in homes built before the 1980s, as asbestos was commonly used in textured ceilings until its ban.
The removal of popcorn ceilings involves a scraping process that requires careful preparation to minimize mess and ensure safety. Preparing the room includes covering floors and walls and wearing protective gear. Depending on the ceiling’s composition and the presence of paint, the actual scrapping can be done dry or with water, which can affect the ease of removal. After successfully scraping away the texture, the bare ceiling often requires refinishing with plaster or a fresh coat of paint to achieve a smooth finish.
Before starting the popcorn ceiling removal process, it's critical to take the appropriate safety measures, prepare the room adequately, and ensure the material is tested for asbestos to protect health and property.
One should never underestimate the importance of safety equipment when undertaking home renovations. Protective gear, such as masks or respirators, is essential for preventing the inhalation of dust and debris. Eye protection and disposable coveralls are also important. It is recommended that a first-aid kit be accessible in the workspace in case of unexpected minor injuries.
Before scraping begins, clear the room of furniture to prevent damage and ensure a safe working area. What can't be moved should be covered with plastic sheeting to safeguard against falling debris. The floors also require protection; you can use a combination of canvas drop cloths for easy movement and plastic drop cloths that are impermeable to moisture. Sealing off doorways and air vents with plastic will confine the dust to the work area, facilitating a clean post-removal process.
If the building was constructed before the 1980s, you should assume asbestos may be present in decorative textures and have a sample tested before proceeding. An asbestos test kit can be used to safely collect a sample without spreading fibers. If asbestos is found, or if there is any uncertainty, a professional should be contracted to perform the removal. Handling asbestos requires specialized knowledge and equipment to prevent health hazards.
Removing popcorn ceilings requires careful attention to avoid damaging the underlying drywall. Two popular methods are employed: the Wet Scraping Technique, which uses moisture to soften the texture, and the Dry Scraping Method, which involves scraping without water. Each method requires specific tools and precautions to minimize dust and prevent gouging the drywall.
For the Wet Scraping Technique, make sure to use a pump sprayer to apply water to the ceiling. Moistening the popcorn texture facilitates easier scraping and reduces dust. The process involves:
Note: Always test a small area first to ensure the water does not cause damage.
The Dry Scraping Method involves removing the texture without water. This method can be messier due to increased dust and requires careful technique to avoid gouging the drywall. When employing this method:
Warning: This method may expose you to more dust and dirt during the removal process.
It's crucial to choose the method that best suits your ability to manage dust, potential drywall damage, and your comfort level with the tools required to remove popcorn ceilings.
After the popcorn ceiling has been removed, the importance of proper surface treatment cannot be overstated. Ensuring a smooth and finished look requires attention to detail and the correct application of materials such as joint compound and techniques for smoothing and applying a skim coat.
Once the ceiling texture is scraped off, you may encounter nicks or gouges that necessitate repair. Sanding is crucial for smoothing out these imperfections and preparing the ceiling for further treatment. The process typically involves:
It's essential to work in well-lit conditions to ensure all areas have been adequately smoothed. Some may prefer using sanding sponges for corners and tight areas.
Applying a skim coat, a thin layer of joint compound or drywall mud, is an essential step in achieving a seamless finish.
Consistency is key, and you should avoid applying too much pressure to achieve a flat and smooth layer. Once the skim coat is dry, a final sand pass ensures a polished and ready-to-paint surface.
After successfully scraping off the popcorn ceiling texture, the next crucial steps involve priming and painting the ceiling. These stages are vital to achieving a smooth, uniform surface and ensuring the longevity of your DIY project.
Choosing the right primer is essential for covering any imperfections and stains that may have emerged during the scraping process. A high-quality stain-blocking primer will seal the surface, preventing previous ceiling texture damage from affecting the final paint job. When working with drywall or plaster that has been exposed after removing the texture, make sure to opt for a primer specifically designed for porous surfaces.
Ceiling paint is formulated differently from wall paint, often with a flatter finish to prevent light reflection and hide imperfections. Durability and ease of application should guide your choice. Select a paint specifically labeled for ceiling use to ensure it can withstand ceilings' unique conditions. These paints also have a thicker consistency, which reduces drippage during application, which is particularly valuable for a DIY project.
When deciding between DIY and hiring a professional service for popcorn ceiling removal, you must carefully weigh the cost and complexity of the removal process against the skill set required and potential hazards, such as asbestos presence.
For homeowners considering DIY popcorn ceiling removal, the process involves several steps where precision and safety are paramount. The DIY enthusiast typically needs to assess:
A ceiling free of asbestos simplifies the DIY approach. A test for asbestos can mitigate safety concerns—this is a crucial first step if the ceiling dates back to the asbestos era.
If you are comfortable handling potential electrical complexities and can perform repair work, you might undertake the project; otherwise, professional involvement is advised.
Hiring a professional service typically comes with a higher price tag, but it can offer peace of mind, especially with potential hazards. Professional popcorn ceiling removal costs fluctuate based on:
An estimation of costs can be seen as follows:
A professional contractor can provide a smooth finish and ensure the removal does not compromise electrical work. Obtaining multiple quotes from contractors is a best practice. This allows for a detailed cost comparison while considering the full scope of the project.
After successfully scraping off your popcorn ceiling, you must pay attention to detail during the final steps. This ensures a clean and well-prepared surface for finishing. Proper cleanup is crucial to prevent dust from settling throughout your home.
Maintaining good airflow is imperative, as dust can linger in the air even after the popcorn texture is physically removed. You should keep windows open and consider using additional fans to facilitate air circulation. This helps clear any suspended particles and ventilate the room thoroughly.
You must properly dispose of all debris in accordance with local regulations. Place the scraped-off material into contractor bags and seal them tightly to minimize dust escape. Pay special attention to any waste that could contain asbestos. This waste requires special handling and should be disposed of at a designated facility.
The final preparation of the ceiling involves several steps:
Following these meticulous steps leads to a ceiling that is ready for its new appearance.
In-home construction and renovation, finishing touches can make all the difference to the overall aesthetic. This is especially true for walls and ceilings, where drywall texture is crucial.
The art of drywall texturing involves applying a chosen material to create a distinct pattern or relief on the surface. These patterns range from simple, subtle finishes to more elaborate and dramatic designs. Among the popular methods are techniques like slap brush, which creates a random pattern similar to stippling, and smooth finishes that offer a sleek, modern look. For those interested in more avant-garde choices, specialty textures resemble concrete or incorporate unique geometric patterns into the design. Drywall textures add visual interest and conceal imperfections, ultimately unifying the space and elevating its appeal.
When embarking on a drywall texturing project, the proper materials are imperative for achieving the desired finish. High-quality tools and preparatory materials are foundational to the texturing process, ensuring a professional look.
Drywall Trowels: You need these to apply textures, and they come in several shapes and sizes. For example, you can use a hawk and trowel technique, which involves a flat plate (hawk) and a metal flat-blade trowel for creating a unique, exposed-rock design.
Knives: Drywall knives of various widths are used to spread drywall mud or compound on walls and ceilings.
Spray Guns and Hopper Guns: These tools are critical for achieving uniform textures like Orange Peel or Lace. A hopper gun is typically used with a drywall compound mixed to a specific consistency.
Rollers: Rollers are used after a base of mud, and water is sprayed onto a surface to create patterns such as the orange peel texture.
Drywall Mud: Also known as joint compound, is the material applied to create texture on the walls. Depending on the texture style, it must be chosen and mixed to the correct consistency.
Paint and Primer: Before texturing, a primer is applied to ensure the drywall surface is smooth and even. After texturing, paint is often used to give the texture color and further refinement.
Under these subsections, professionals may need to incorporate additional materials like sandpaper for smoothing or specific texturizing additives mixed with the drywall mud for enhanced effects. Each tool and material has a unique role in the process, making understanding and choosing such items crucial for a successful drywall texturing project.
Mastering basic drywall texturing techniques is essential for creating a professional finish. Understanding the proper use of tools and materials is key to effectively applying mud, creating patterns, and applying finishing touches.
The initial step in drywall texturing is applying mud. A trowel or finishing knife spreads a thin, even layer of drywall joint compound, commonly called mud, over the drywall surface. This mud is the foundation for the texture and must be applied smoothly to prevent blemishes.
Once the mud is applied, various tools can be used to create patterns in the texture. Common designs include:
Patterns vary in complexity, from simple comb swirls to more intricate layered designs. The desired pattern will dictate the specific technique and tools used.
The final phase involves finishing touches to perfect the texture. Once the mud has partially dried, they enhance the texture by lightly smoothing or altering the design with a knife or other tools. Adding sand to the mud can create additional texture. When the desired effect is achieved, and the mud is fully dry, they sand the surface lightly, if necessary, to prepare it for painting or further finishing.
Each technique in drywall texturing is a combination of careful application, creative patterning, and meticulous finishing. With the right approach, textured walls can add a unique and appealing dimension to any room.
Drywall textures add character and unique appeal to walls and ceilings in homes. Each texture style offers a different aesthetic and may require varying expertise levels. Here, we explore some of the most sought-after drywall textures that homeowners and contractors use to enhance interior spaces.
Spray-applied textures are known for their efficiency and uniformity. Popcorn texture is a classic choice for ceilings, providing acoustic benefits and a stippled aesthetic. It involves spraying a mixture containing vermiculite or polystyrene, which is left to dry without further manipulation.
Meanwhile, orange peel texture resembles the skin of its namesake fruit and presents a fine, splattered look that hides imperfections. You need a hopper gun followed by a light smoothing process to apply this texture.
Another spray option is knockdown texture, where droplets are flattened with a knife, creating a mottled texture that adds a warm and earthy feel to rooms. Lastly, lace texture is achieved by spraying on two layers: a heavy coat to form the base and a lighter coat to create a lacy pattern.
Hand-applied textures offer a more bespoke finish and allow for a great deal of artistry.
For instance, skip trowel texture is a hand technique that results in a smooth, slightly stippled surface, providing a Mediterranean vibe. Artisans use a curved knife to apply the texture randomly, arching, giving it a subtle and delicate finish.
Meanwhile, comb texture involves creating systematic patterns using tools to rake over the applied drywall mud, resulting in a series of rainbows or other designs.
The rosebud and sand swirl textures are also applied by hand. The rosebud mimics the shape of a flower with repeated stamps, while the sand swirl involves a mixture of perlite and a brush to form swirling patterns.
Finally, some hand-applied techniques, such as Santa Fe texture, radiate a minimalist feel with smooth surfaces and subtle texture. In contrast, slap brush texture provides a more rugged, randomized pattern that involves slapping the wall with a paintbrush or stomp brush, sometimes followed by a knockdown step to temper the roughness.
Drywall texture styles range from complex and artistic to simple and utilitarian, and choosing the right one depends on the desired visual impact and practical functionality within a space.
Homeowners and designers who wish to infuse spaces with unique characteristics often turn to specialty and modern textures. These textures go beyond conventional options and add a distinct personality and artistic flair to walls and ceilings.
Artistic and custom textures are designed to make a statement. They often entail the application of materials like Venetian plaster, which incorporates marble dust to achieve a polished, high-end look. This technique allows for a Venetian style that radiates opulence, resembling the smooth and lustrous appearance of marble itself.
Skilled artisans can also create bas-relief designs that give walls a three-dimensional aspect, turning them into works of art.
Regarding high-end drywall texturizing methods, the focus is on adding tactile and visual character to the surfaces.
Methods like stucco can be tailored to modern sensibilities, providing a durable and timeless finish.
Meanwhile, paint-enhanced textures offer an additional layer of sophistication, as they can subtly highlight the inherent textures within the drywall, giving a room more depth and character.
Repairing and removing drywall textures requires carefully restoring walls to their desired finish. Whether addressing minor scrapes or revamping an entire room's texture, one must know the tools and materials—such as drywall mud, primer, and paint—necessary for a successful job.
When imperfections in drywall texture arise, the first step is to assess the damage and prepare the surface. Small holes or dings can be filled with drywall mud, and a putty knife can be used to apply the compound smoothly over the area. Once the mud dries, sand it to create a flat surface, blending seamlessly with the surrounding texture.
To repair larger areas or match specific wall texture types such as stucco or orange peel, you may need to mimic the original technique used. This could involve specialty brushes or rollers to replicate the pattern. After texture repair, apply a coat of primer, followed by matching paint, to complete the appearance of a flawless wall.
Replacing outdated textures, such as a popcorn ceiling, begins with the removal of the existing material. This often involves moistening the texture with water to soften it, followed by careful scraping. Safety is paramount during this process, as older textures may contain asbestos.
To update the wall's texture, you must first ensure the surface is clean, dry, and smooth. Applying a new layer of joint compound gives a fresh canvas to apply the chosen texture. This is also the time to apply a primer to aid in the adhesion of the new texture. Various tools can achieve different effects, from brushes creating a swirl pattern to sprayers achieving a uniform orange peel finish. Once the texture is applied and dried, seal it with paint to protect and enhance the new look.

Before adding texture to drywall, meticulous surface preparation ensures optimal adhesion and a flawless finish. This process involves priming and applying base coats that serve as the foundation for various textures.
For successful adhesion of texture, drywall must be primed. You can begin by addressing any imperfections with either drywall mud or lightweight spackle, ensuring these patches are flush with the surrounding surface. After filling in holes and smoothing ridges, it's essential to wipe away dust from sanding to prevent interference with the texture's ability to stick. Then, apply the primer. Typically, a flat white latex wall paint or drywall-specific primer gives the drywall a uniform, non-porous surface that helps the texture material to adhere evenly. Leave the primer to cure for at least two hours before texturing begins.
Once the surface is primed and dry, the application of base coats is next. The choice of materials for a base coat can include drywall mud, thinned to the correct consistency if necessary. It's common practice to mix drywall compound with water at a ratio of 4:1 until it reaches the texture of smooth cake batter. For certain textures, like those created using a paint sprayer or roller, applying one or more layers of this mixture creates the desired base upon which the texture will be formed. Consistency and uniform layering are crucial as they influence the final appearance and durability of the drywall texture.
The means by which textures are applied play a pivotal role in the resulting aesthetic of drywall texturing. Incorporating various tools and techniques ensures that drywall professionals can achieve specific patterns and finishes.
Spray Texture Methods utilize equipment such as the hopper gun and air compressor to apply texture material to walls and ceilings. The hopper gun, connected to the air compressor, propels the texturing mix through a nozzle onto the surface. Here's a brief overview of the process:
Techniques such as the spray sand finish involve mixing sand with water and primer to create a rough texture reminiscent of wet sand that can be applied using a standard paint sprayer.
Hand Texture Methods, on the other hand, rely on hand tools such as stomp brushes, slap brushes, crows foot brushes, toothed trowels, and knockdown knives. These tools can create a myriad of patterns:
Applying these hand textures requires a mix of skill and patience to ensure consistent and desirable outcomes. The technique involves:
When incorporating drywall textures into a design plan, you must consider how the textures reflect the space's personality and how they integrate into the overall room design. Different textures can profoundly affect a room's ambiance and style.
Every drywall texture type adds a distinct character to walls and ceilings. Whether the choice is a subtle orange peel that provides a gentle, uniform look relevant for various spaces, or a more robust knockdown texture favored in modern design, selecting a texture should echo the homeowner's personality. Additionally, custom textures created by artisans can impart unique patterns that elevate a design to the next level.
Integrating wall textures in room design hinges on balancing visual weight, color choice, and the interplay with lighting. Rough textures like popcorn are often exclusive to ceilings due to maintenance and aesthetic considerations, and they contribute to acoustical dampening.
| Drywall Type | Preferred Room Usage |
|---|---|
| Popcorn | Ceilings for noise reduction |
| Knockdown | Living rooms, bedrooms |
| Orange Peel | Versatile for walls and ceilings |
Textured walls can be painted to enhance or subdue their impact; lighter colors minimize the texture's appearance, whereas darker shades accentuate it. When a room's design calls for simplicity, subtle textures paired with soft color choices can impart a sophisticated background. Conversely, bolder patterns can be a statement, especially when paired with contrasting colors.
Maintaining textured walls requires careful attention to detail to ensure their aesthetic and structural integrity. Specific care tactics can preserve and refresh various drywall textures' unique characteristics.
Avoid harsh chemicals and excessive water when cleaning and caring for textured walls. Textured surfaces should be dusted regularly with a microfiber cloth or a duster with gentle bristles to prevent dust accumulation, which can mar the visual appeal. Use a vacuum with a soft brush attachment for deeper cleaning, ensuring that the unique wall textures remain unharmed. In stains, a damp cloth with a mild detergent should be lightly dabbed, not rubbed, on the affected area.
Popcorn texture necessitates even greater caution during cleaning due to its propensity to chip off if mishandled. For this distinctive texture, some homeowners need professional cleaning services, as standard methods might not be appropriate.
When painting over textured walls, you must first ensure that the surface is clean and free from imperfections. Fill any holes or cracks with a suitable compound that matches the existing texture.
Choose the right type of paint and application technique to avoid reducing the texture's prominence.
Before painting, you must apply a primer designed for textured surfaces. This helps the paint adhere better and provides a consistent finish.
Additionally, when selecting paint, consider the sheen. A flat or matte finish often hides imperfections better, while higher gloss levels can make irregularities more noticeable.
When exploring the construction of walls within residential and commercial buildings, one might wonder about the correlation between drywall installation and insulation. Often, the same teams are seen working on what appears to be related tasks. However, while drywallers specialize in installing drywall—known as gypsum or plasterboard—that provides a smooth surface for interiors, insulation is a separate component that plays a critical role in energy efficiency and temperature regulation inside a building.
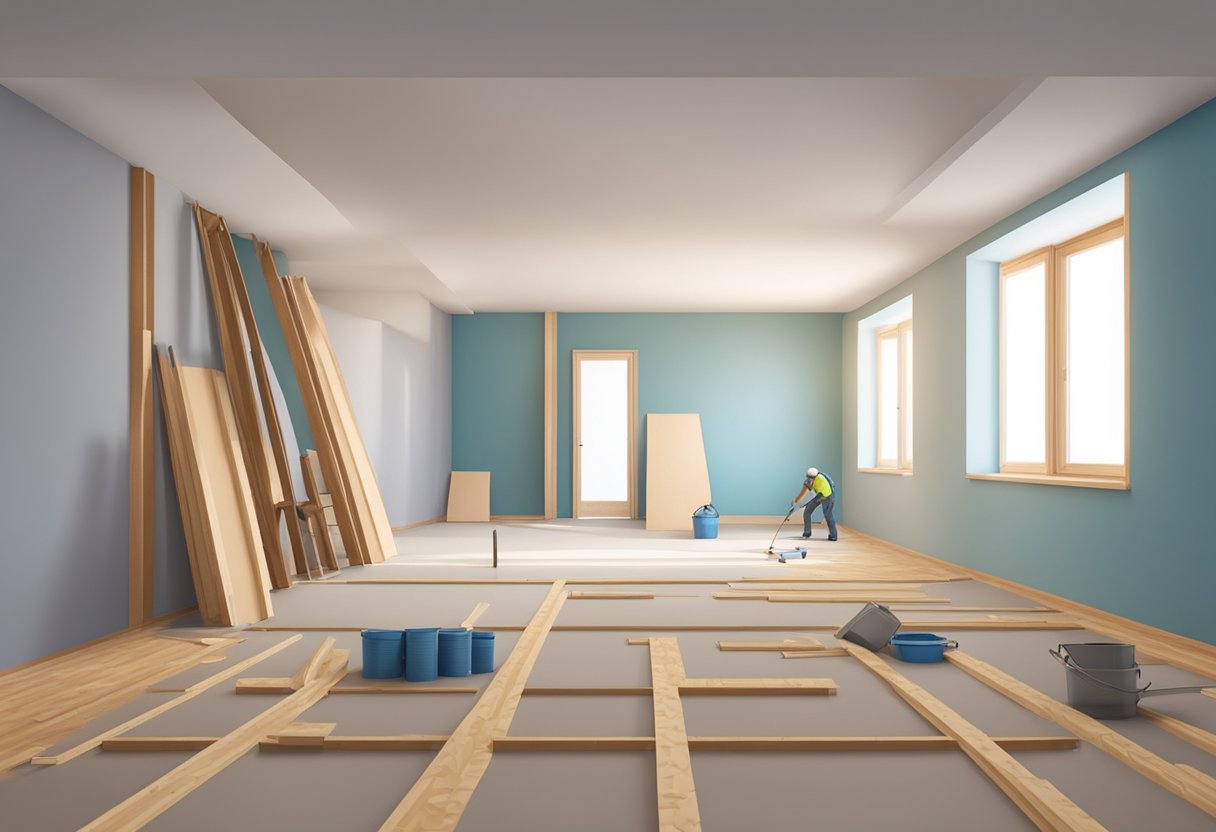
Insulation must be installed to create a thermal barrier. This can involve different materials and methods based on the specific needs of a space. While drywallers have the skillset to affix drywall panels to the framing of a structure, installing insulation may or may not fall within their purview. The process might differ based on whether the insulation is being fitted into new construction, retrofitted into existing walls, or if specialized insulation techniques are required. Safety and adherence to best practices are paramount in insulation installation, as improper application can lead to issues like moisture problems or reduced effectiveness.

Before delving into the specifics of insulation, it's crucial to comprehend what insulation is and why it's significantly beneficial for buildings. The following subsections will cover the definition of insulation and its broad range of benefits.
Insulation is a material used to reduce heat flow between a building's interior and exterior. It achieves this by trapping air pockets and minimizing heat transfer through walls, attics, and floors. The effectiveness of insulation is measured in R-values; the higher the R-value, the greater its ability to resist heat flow. Common types of insulation materials include fiberglass, foam, and cellulose. The U.S. Department of Energy provides guidelines on recommended R-values based on regional climate conditions.
Installing insulation is highly advantageous due to its capacity to enhance energy efficiency within a building. This results in sustained energy savings as it reduces the demand for heating and cooling systems, leading to lower utility bills. Moreover, well-insulated buildings offer a consistent temperature throughout, increasing overall comfort. Effective insulation also contributes positively to the environment by decreasing energy consumption, which in turn reduces the carbon footprint of the household or building.
When considering drywall and insulation projects, one must understand the variety of insulation materials available and the methods used to install them. These materials and methods directly impact a space's energy efficiency and comfort.
Fiberglass Insulation: It consists typically of fine glass fibers and is available in batt and loose-fill forms. Batt insulation is sold in pre-cut panels, which can be fitted between studs, joists, and beams. Loose-fill fiberglass is pneumatically blown into cavities or attics, providing a tight seal.
Cellulose Insulation: Made from recycled paper that’s been treated for fire resistance, cellulose insulation is also offered as loose-fill. Its high R-value per inch makes it an effective insulator, hindering thermal transfer efficiency.
Spray Foam Insulation: As a spray foam, this material expands to fill cavities and create an airtight seal. It's optimal for irregularly shaped areas and around obstructions where traditional insulation types may fall short.
Batt Installation: Before placing this between framing members, workers should ensure that the space is clean and dry to prevent issues with mold or mildew. A cut-to-fit approach is necessary around obstacles to maintain the insulative properties.
Loose-Fill Techniques: Technicians blow or pour fiberglass or cellulose into spaces using specialized machines. These materials conform to the space, which is crucial for irregular or hard-to-reach areas. They achieve an effective insulation layer without compressing the material, which can reduce efficacy.
Spray Foam Application: This requires skilled professionals who mix and apply the product on-site. The insulation expands rapidly on application, creating a vapor barrier and sealing air leaks. It's effective for both thermal insulation and as an air barrier system.
When constructing or renovating a space, drywallers play a pivotal role in installing drywall and potentially adding insulation, ensuring the space is finished efficiently and effectively.
Drywallers may be tasked with installing insulation as part of their construction or renovation project work. This role typically involves placing insulation material between studs just before installing the drywall. Insulation is crucial for thermal efficiency, soundproofing, and often fire resistance. While some specialize only in drywall installation, others are skilled in both areas, offering a comprehensive service.
The specifics of whether a drywaller will install insulation can vary based on their skill set and the demands of the project.
In addition to insulating and installing drywall, drywallers frequently handle related tasks to ensure a wall is ready for finishing.
When a drywaller is equipped to handle insulation, it can streamline the process of construction by minimizing the number of subcontractors involved. This often results in a more coordinated effort during the finishing phase of a project, as it allows for better scheduling and fewer interruptions to the workflow, which can be particularly beneficial in tight timelines.
Installing insulation is a task that requires adherence to safety procedures and best practices to ensure both a successful installation and the safety of the individuals involved.
Wearing the appropriate personal protective equipment (PPE) is crucial when handling insulation materials. This PPE should include safety glasses or goggles to protect the eyes from dust and fibers. A dust mask or respirator is also important to prevent the inhalation of small particulates. Individuals should wear long-sleeve shirts, long pants, and closed-toed shoes to protect their skin from irritation caused by insulation materials. Lastly, gloves should be worn to protect the hands during installation.
Choosing between a DIY project and hiring an insulation contractor depends on experience, skill, and the scope of the project. Homeowners may undertake small insulation projects, but professionals typically recommend professional installation for more complex tasks.
Professionals ensure that the insulation fits properly and that they install vapor barriers in the correct orientation. This prevents issues like mold and condensation. They can also navigate building codes and maximize energy efficiency.
On the other hand, doing a project oneself can be more cost-effective and gratifying. However, you must thoroughly understand the installation process and safety precautions.
Drywall damage is a common household problem, affecting your walls' aesthetics and structural integrity. From small dents and holes to larger areas of damage, repairing drywall is a skill that homeowners can benefit from learning. Minor repairs might be straightforward, but more significant repairs will require a methodical approach to ensure a smooth, seamless finish that blends into the surrounding wall.
Before beginning any drywall repair, you must assess the damage and gather the necessary tools and materials. This might involve a simple patch or may require replacing sections of drywall. After that, you must prepare the area by cleaning and sanding, then carefully executing the repair work. Once the repair is complete, finishing touches including sanding, painting, and texturing will help conceal the repair, making the wall look as good as new.
Drywall repair begins with carefully inspecting the wall to understand the extent and type of damage present. This assessment will dictate the appropriate techniques and materials for a successful repair.
You should meticulously examine the drywall for these common problems. Note that shallow damage often affects only the surface layer, while deeper issues may involve the entire drywall thickness.
Selecting the correct repair method is crucial for durability and aesthetics, as cited by sourcing detailed guides like those from Redfin and Woodsmith. The goal is to restore the wall's integrity and appearance effectively.
Before beginning the repair process, make sure you have the correct tools and materials and that the work area is well-prepared. This preparation is paramount to achieving professional-looking results and to ensure the process is as smooth as possible.
You should collect all essential tools and materials before starting the repair to avoid any interruptions. The following list highlights the required items:
Preparing the work area entails several steps to ensure a safe and efficient environment:
Properly executing drywall repair requires attention to detail and the correct methodology. Whether a small puncture or a more significant breach, the same care and accuracy are needed to achieve a seamless fix.
For small holes (like nail or screw holes), the solution is straightforward. Clear away any loose debris then fill the hole with joint compound using a putty knife. Allow it to dry, and then sand the area smooth. In some cases, such as slightly larger holes, it may be beneficial to apply mesh drywall tape for additional support, followed by the joint compound.
Repairing a larger hole or crack follows a process of patching drywall. For holes, you must first cut out the damaged piece and measure a new piece of drywall to fit. Make sure the new piece matches the thickness of the existing drywall. After securing the new piece with drywall screws to the studs, tape the edges with drywall tape to ensure stability and fill seams with joint compound. Sand once dried for a smooth finish.
Some scenarios, such as damaged areas near load-bearing structures or those requiring fire-rated drywall, demand distinct approaches and materials. For instance, a larger hole that compromises structural integrity may necessitate the use of a support piece, such as a furring strip, behind the new drywall patch before being securely screwed in place. Special cases should always adhere to local building codes and manufacturer recommendations.
The final stage of drywall repair ensures a seamless blend with the surrounding surface. Proper sanding and priming set the foundation for a flawless paint job.
After thoroughly drying the joint compound, you should begin sanding the area to create a smooth, flush surface with the wall. Use fine-grit sandpaper or a sanding sponge to buff the repaired spot gently. This step is crucial to remove any ridges or bumps. Make sure to sand with light pressure to avoid creating indentations or removing too much of the compound. The goal here is to ensure the patched area is indistinguishable from the original wall.
Tips for Effective Sanding:
Once the surface is smooth, the next step is to apply a coat of primer to the sanded area. Primer ensures that the paint adheres properly and that the repaired area does not absorb the paint differently than the rest of the wall, which can cause discoloration. After the primer dries, you should apply the paint, blending it into the surrounding areas to prevent any visual discrepancies. If the existing wall has a specific texture, you should replicate it on the repaired area before priming.
Key Steps for Primer and Paint:
Remember: Using the correct techniques and materials during these final stages greatly influences the overall appearance and quality of the drywall repair.
When you engage in DIY drywall repairs, cleanliness and regular maintenance are key to a long-lasting finish. After you finish the repair work, don't overlook the importance of proper cleanup to ensure the area remains healthy and safe.
Remembering these tips will help to keep the work environment safe and maintain the quality of your drywall repairs. Always prioritize health by minimizing dust exposure and maintaining clean repair tools.
Drywall repair is a common necessity for homeowners, as the walls and ceilings of a home can suffer from a variety of damages over time. Factors like accidental holes, cracks, water damage, and general wear and tear can compromise the integrity and aesthetic of drywall. Understanding the costs associated with repairing drywall is key for homeowners looking to maintain their property effectively. The cost of repair can vary significantly based on the extent of damage, the size and number of areas that need work, and whether the drywall has sustained water damage or mold.

When faced with damaged drywall, homeowners have to decide whether to undertake the repair as a DIY project or to hire a professional. The choice can impact both the cost and the quality of the repair. While small patch jobs may be manageable for DIY enthusiasts, larger repairs or those involving complex issues such as mold remediation or structural concerns usually require professional intervention. Additionally, the location of the damage, whether it is on the wall or ceiling, and the accessibility of the area can affect the labor costs and overall expenses of drywall repair.
Drywall repair cost can vary widely, with factors like damage severity and repair size playing critical roles in determining the final price. Below you'll find specifics about what goes into assessing these expenses.
The cost of repairing drywall is influenced by several key factors:
To accurately estimate the cost of drywall repair, an assessment of the damage is necessary. This encompasses:
A rough breakdown of costs can be provided by looking at common repair scenarios:
Remember, these figures are simply estimates. The national average cost can give a rough idea of what to expect, but obtaining multiple quotes from local professionals provides the most accurate reflection of the expected drywall repair costs.
Repairing drywall is a task that involves preparation, precision, and patience. It is a multi-step process that requires attention to detail, from pristine surface preparation to the final touches of painting.
Before beginning drywall repairs, the area should be cleared of furniture and other belongings to prevent damage and provide ample working space. Safety is paramount, so one should wear protective gear, including eye protection, masks, and gloves. Ensuring adequate ventilation is also crucial, especially when sanding or using chemicals.
Drywall repairs necessitate a specific set of materials and tools. One will need:
1. Assessing the Damage: Identify the size and location of the damage, whether it’s nail holes, doorknobs impacts, or sagging in the ceiling.
2. Cutting and Placement: For larger repairs, measure and cut a new piece of drywall to replace the damaged section. Secure it with screws.
3. Applying Compound and Tape: Cover seams with drywall tape, then apply a thin layer of mud using a putty knife. Allow it to dry thoroughly.
4. Sanding: Once dry, sand the area until smooth. Take care not to sand too aggressively to avoid further damage.
5. Painting and Texturing: Match the paint and texturing to the rest of the wall or ceiling to complete the repair seamlessly.
From patching small nail holes with a bit of spackling to replacing entire sections of damaged drywall, each step must be executed with care to ensure a smooth, unblemished wall or ceiling surface.
When faced with drywall damage, homeowners must decide whether to tackle the repairs themselves or hire a professional. The path chosen can significantly affect both the cost and the quality of the repair.
In cases of severe damage or when dealing with structural issues, it is wise to hire a professional contractor. A proficient handyperson or a licensed tradesperson, such as an electrician or painter, is often necessary when replacing drywall or addressing water damage and electrical work. Professional contractors often charge by the hour, with rates from [Angi's 2024 data] suggesting $60-$100 per hour, although this can escalate for specialized work. Larger repairs, such as ceiling repair, can incur higher costs due to the complexity of the work involved.
For minor repairs, such as a small hole or crack, homeowners may opt for a DIY drywall repair to save money. To undertake a DIY project successfully, one should:
For an accurate cost estimate, homeowners should consider both material and potential tool rentals. While doing it yourself can be less expensive, the cost to patch drywall varies based on the size and accessibility of the damage.
When considering drywall repair costs, it is essential to take into account additional factors such as the extent of water damage, the scale of repairs across multiple rooms, and the finishing work required post-repair. These elements can influence the total investment needed to return walls and ceilings to their original condition.
Water damage repair can significantly affect the cost due to the complexity of mold remediation. If mold damage is present, professional mold removal may be necessary before replacing any drywall. The steps typically include drying out the affected areas, treating them to prevent mold, and then installing new drywall. For ceiling repair, especially from roof leaks, costs can increase due to the need for specialized equipment or techniques.
The number of rooms requiring repair can scale the cost based on the size and scope of the damage. Drywall contractors often determine the cost by square foot or by the number of drywall sheets needed. For larger repairs such as those in multiple rooms, clients might negotiate a reduced rate for a more extensive project.
After drywall repairs are done, painting and updating the finish of the walls are normally the next steps. This might include spackling, sanding, and applying primer before the final paint. Supplies for these tasks can be found at stores like Home Depot or Lowes. The price to paint will vary depending on the quality of paint chosen and whether additional features like nail pop repair or crack repair are needed. The costs may rise further if the repair requires drywall tape repair or fixing torn drywall.
Keep these considerations in mind when budgeting for drywall repairs to ensure a comprehensive understanding of the potential costs. Hiring proficient contractors and investing in quality materials can pay off significantly in the long-term durability and finish of the walls and ceilings.


